
A while ago I posted some notes on booting from the virtual media function available in the iLO remote management system in my HPE machines. This time, I want to share a variation on that theme which might be of interest to any farmers who are thinking of getting into fully network based booting, rather than booting from USB or optical disk.
Before going on, if you just want “normal” (PXE) network booting, there are some other guides by Nelson and by flowmotion here on the forum. The approach I show in this post requires remote management like iLO (I think Dell’s iDRAC could also work), but also doesn’t require any special router configuration, just a web server running in your LAN.
Motivation
Although I was fairly satisfied with the original method, it had two major limitations:
- The virtual media was only available while the remote console window was active in the web browser on my laptop
- Boots were rather slow (and these machines aren’t fast to boot in the first place)
This was okay for occasional maintenance like switching the nodes from mainnet to testnet for some testing by overwriting their boot USB sticks and wiping their disks. However, I was also interested in experimenting with an entirely network based solution for regular operation of the nodes. At the same time I couldn’t help but wonder if I could somehow speed up the boot process.
It was time to make some changes to the nodes again for testing the new Farmerbot, and it was time to find a better way.
“Scripted Media”
In the iLO interface, under the virtual media tab, there’s a place to enter a “Scripted Media URL” for virtual floppies and CDs. It looks like this:
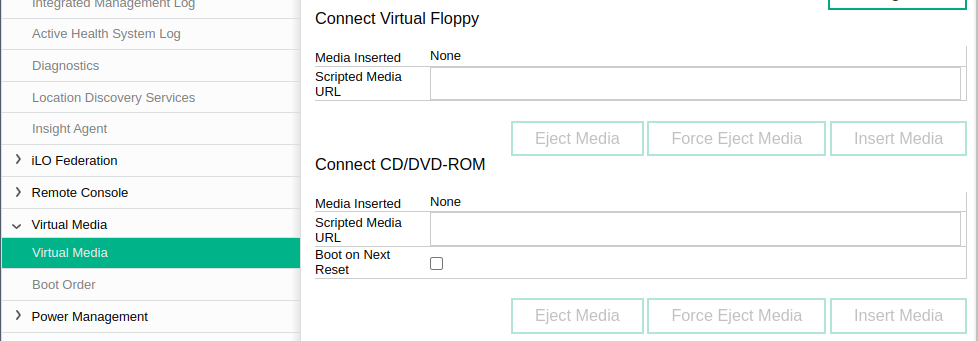
I remember trying this feature without success before, and reading around the web a bit, it seemed to be giving others trouble too. But the idea is pretty cool: the system can boot from an IMG or ISO file on a regular web server inside the LAN or out on the internet.
While I don’t have any experience with enterprise grade Dell hardware, it appears that their iDRAC system also offers a similar feature, known as “Remote File Share”. If you have any reports on using a solution like this outside of iLO in HPE system, please let me know in the replies.
The thing that makes this feature so tricky to get right, at least on my systems with iLO 4, is that problems can manifest as a freezing in the boot process or in the machine just proceeding with regular boot without warning. To minimize any issue coming from my own setup and for quick feedback, I decided to start with something small I could grab over the internet.
netboot.xyz
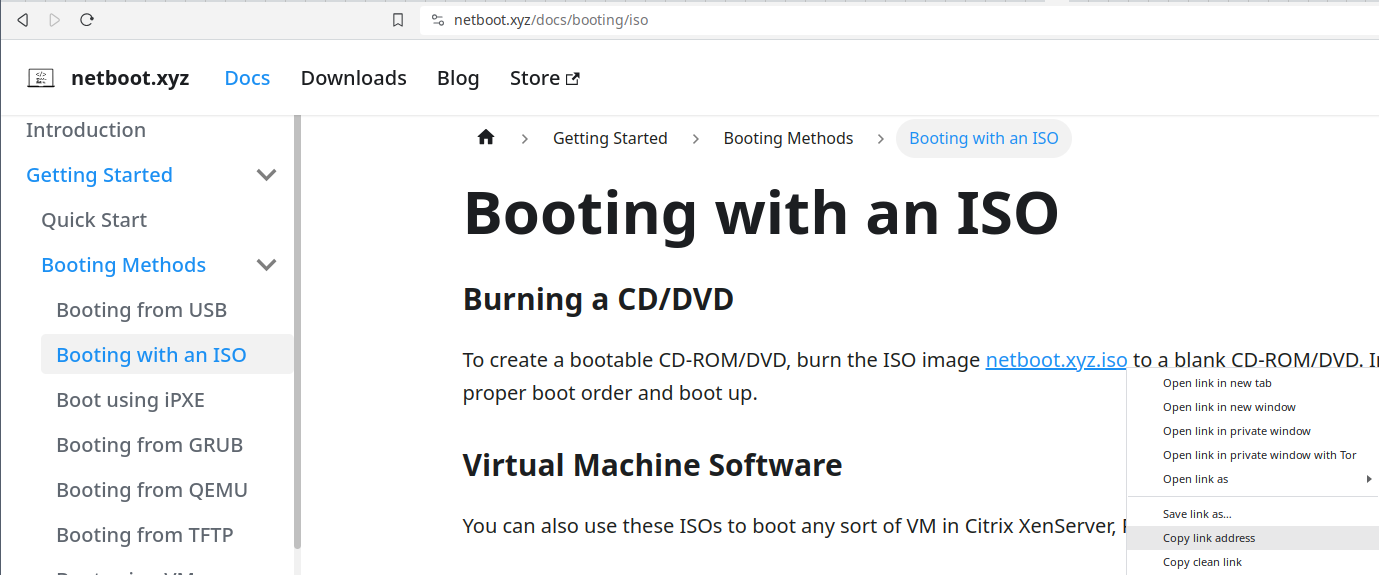
If you didn’t hear of netboot.xyz, it’s a great little project that provides a helper to network boot from a catalog of mostly Linux install and live media. It’s based on iPXE, like our own Zos bootstrap, and there a variety of ways to use it, including an ISO image.
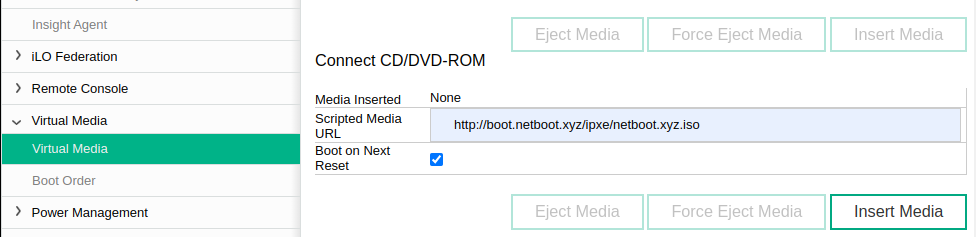
For this step I copied the ISO link and pasted it into the scripted media input box. Here I used HTTP rather than HTTPS for maximum compatibility.
First copying from the netboot.xyz site:
And pasting into the iLO interface:
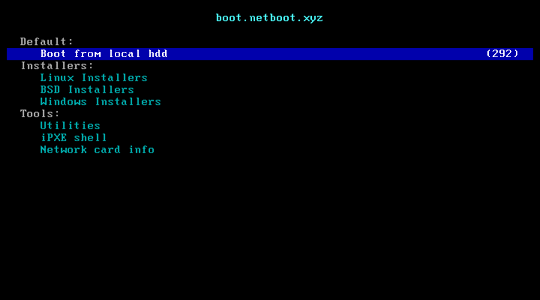
After I hit insert media and reboot the system, I reached the netboot.xyz menu and was able to successfully boot into a couple different Linux environments like Alpine. This method was even much faster than inserting the virtual media from my laptop’s disk into the virtual console, despite the fact that the ISO and subsequently loaded operating system were coming in over the internet.
With that success, I was ready to work on booting from media hosted in my LAN. This would achieve two things. First, I could be sure I was always booting the same known working version of an image for recovery purposes, and potentially even make a custom image for this at some point. Second, I could also host my Zos boot media in the same way and boot the node regularly from them without needing a USB stick.
One note to mention here is that, while the iLO documentation states that this scripted media will remain inserted indefinitely (unlike those presented via the virtual console), I haven’t done any long term tests. Booting from physical media or a PXE network boot setup may very well be more robust.
Home sweet web server
For this step, I needed a web server in my network that was reachable by the 3Nodes. I use a router running OpenWrt and I thought it would be fun to try serving the files directly from the router. That’s just one way though, and this could be done with a Raspberry Pi, a NAS, or any other machine that’s always running in your network.
There was a bit of an “ah ha” moment when I realized that my router is already running a web server (it must be to serve the web management page). I could start serving files just by moving or symbolic linking them to the root of the existing web server!
This worked okay as a proof of concept. I had some limited success with smaller ISOs like netboot.xyz, but booting would hang if I tried a larger image like Alpine. For long term use I also wanted to separate the ports so I could firewall the management interface and the boot image service independently.
I won’t say everything about the setup in OpenWrt, but here are some highlights:
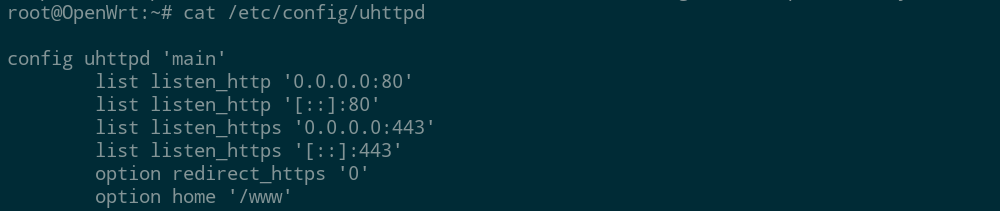
- The included
uhttpdweb server that serves the web management interface doesn’t have the needed capabilities to supply a 200mb ISO file to iLO to boot it as virtual media - Nginx works well for this and is surprisingly lightweight even with a few dependencies. It takes a minute to understand how OpenWrt wraps the Nginx config, but the documentation is adequate
- Even so, my router is just a standard wifi router (Archer A7) that I’ve reflashed. The CPU gets really busy serving large files. While I didn’t notice any service degradation for other devices using the network, it’s definitely a stretch for the hardware
If you want to use an Ubuntu or Debian system for this, the steps are basically:
apt update && apt install nginx
systemctl start nginx

cp example.iso /var/www/html/
Re-reboot again
In any case, the end goal is that you have your chosen ISO file available to be served up at some LAN address. You can test it in a simple way using a web browser. Opening the link should trigger a file download.
Back in iLO, I can now supply my local URL on port 8000 of the router (replace with the IP, port, and image path from your setup). Then reboot the machine, yet again 

This works, and the performance is good. If I want to boot permanently from the virtual CD, I just need to rearrange the boot order for the machine so that CD/DVD is at the top. I can also generate Zos bootstrap ISOs for my different farms and switch between them just by changing the URL here.
So that’s how to boot from network served virtual media in the LAN. It’s a relatively simple and flexible way to get started with network boot, if your machines support it. And the word “scripted” here refers to the fact that this can be automated, via iLOs SSH service or otherwise, though I didn’t try that.
Eventually I’ll get around to trying out PXE network booting via DHCP and a TFTP server. OpenWrt uses dnsmasq which has all the needed functions built in, and there are guides available. For now, I’ll just share some additional findings around using iPXE based on my experiments for this project.
iPXE as a boot shell
One of the things I tried along the way is booting into an iPXE ISO as virtual media and using that to bootstrap the next phase of booting. This mostly served as a good way to learn a bit more about how network booting works, but there’s a distinct advantage to using iPXE as an intermediate step while testing boot methods.
The thing with virtual media is that if there’s a typo in the URL, for example, the system just proceeds with its normal boot order, and it requires another reboot to try again. With iPXE, it’s possible to get some feedback on what you’re trying to do without needing to wait for another full boot cycle. The iPXE ISO is small enough to load right form the virtual console without issue, and it provides a basic shell to play with.
I had hoped that I could even try bootstrapping another network ISO using iPXE. Alas, it’s not so simple. There is a method described here, but it requires the use of the MEMDISK bootloader which is only available for BIOS (legacy) boot mode. I didn’t find a way to boot the iPXE ISO in legacy mode, and I think that might not even be possible when using virtual media.
That said, the iPXE shell can be used to verify that the files you’re hoping to boot are actually reachable from a given machine (especially if you have multiple subnets or fancy firewalling at play). It can also be used to chainload SYSLINUX (which does work with UEFI) or other iPXE scripts (such as Zos bootstrap). When something doesn’t work, it’s often possible to cancel it and drop back into the shell, though some mistakes do require a reboot.
With iPXE, it’s possible to do a number of cool things, like build boot menus that have defaults that are activated automatically after a timeout. It can even be flashed in place of the regular PXE image in some network cards, expanding the features. I’m not sure if it would have a permanent place in any future set up, but it’s definitely a tool to be aware of if you’re getting into this stuff.