
Hi all,
This tutorial covers how to use a WireGuard configuration from the TF Playground to connect to a VM running on the Grid from a Windows machine. The support for WireGuard was added to the new version of the Playground recently, so this is a nice way to use a feature that was previously only available in Terraform and the development SDKs. This is especially interesting to Windows users who are having trouble using Planetary Network, because it provides another way to connect to VMs without paying to reserve a public IP.
Prerequisites
What I won’t cover here is how to get started with the Playground or how to set up your SSH client. Follow those links to the manual for more information.
That means you’ll need:
- Activated and funded account set up in the new Playground: playground.grid.tf
- SSH client (I recommend OpenSSH)
Creating the deployment
What we’ll deploy is a generic VM. Either micro VM or full VM is fine, at your preference. The important thing is to enable the WireGuard configuration within the network section. You can disable Planetary Network if you want to—actually if you don’t plan to use it then disabling it can add a bit of security.
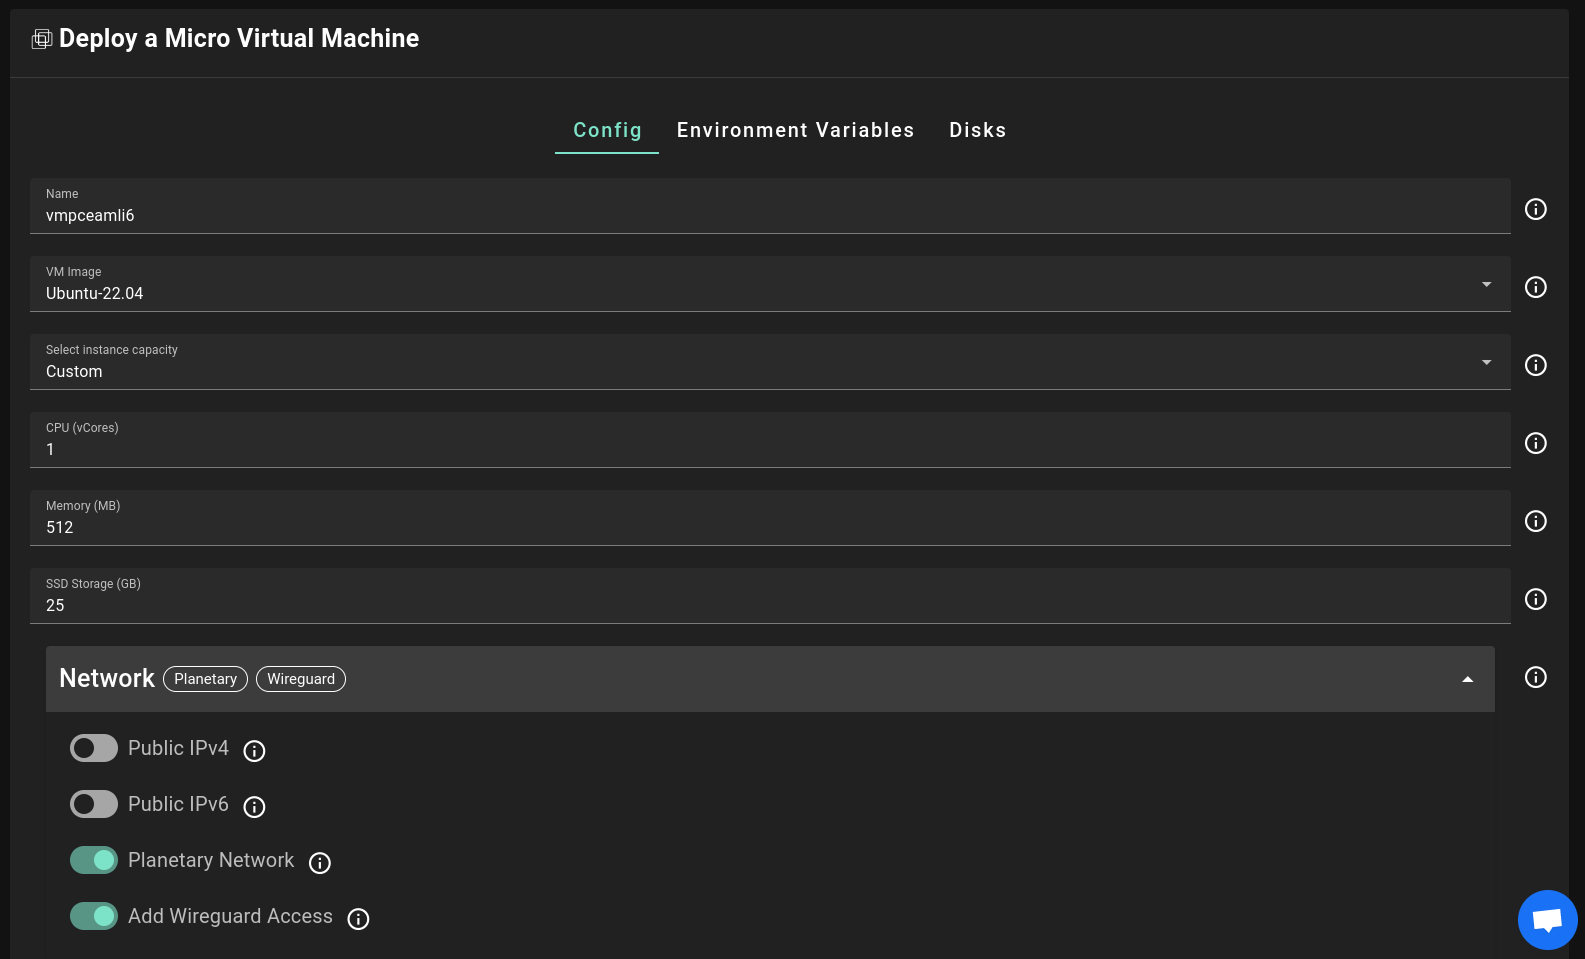
After you’ve selected your VM resource allocation and the node to deploy on, go ahead and deploy it.
Install WireGuard
You’ll need to install the WireGuard client on your local machine. Just download the installer from this page and run it.
Connect
Once the VM is done deploying, you’ll see the details page, where you can find two fields relevant to our goal:
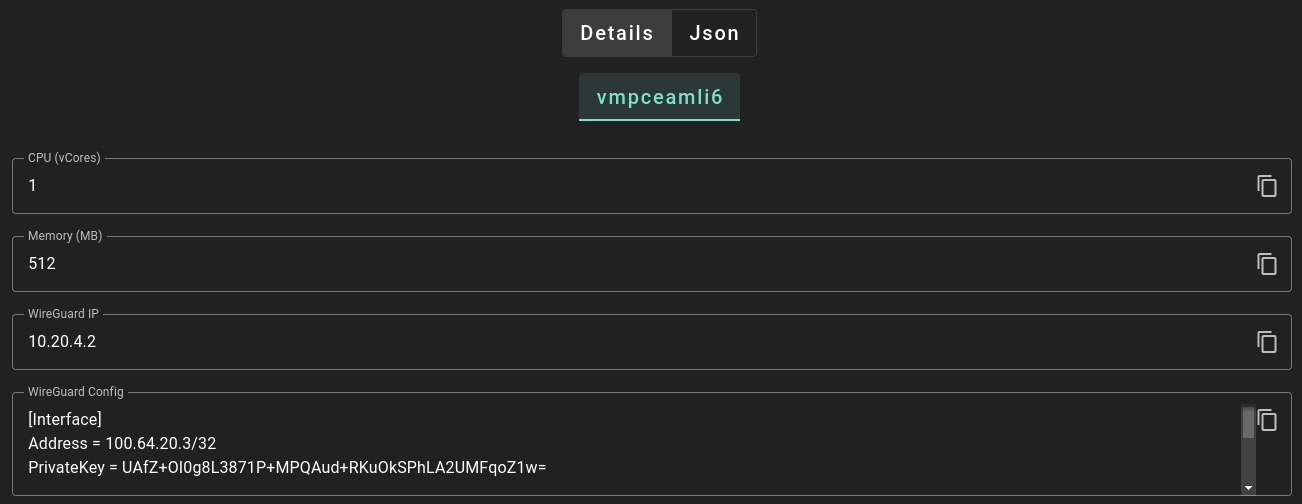
First is the WireGuard IP of the VM. You’ll need that later for SSH. Right now, we’re interested in the WireGuard config. Copy it and make sure you get the whole thing, since it’s going to be longer than what you see in the box. Maybe use that handy dandy copy button over on the right to make your life easy.
Add the tunnel
Next we’ll open up the WireGuard program that’s been installed (it might open automatically after installation is finished). Hit the menu arrow next to Add Tunnel:
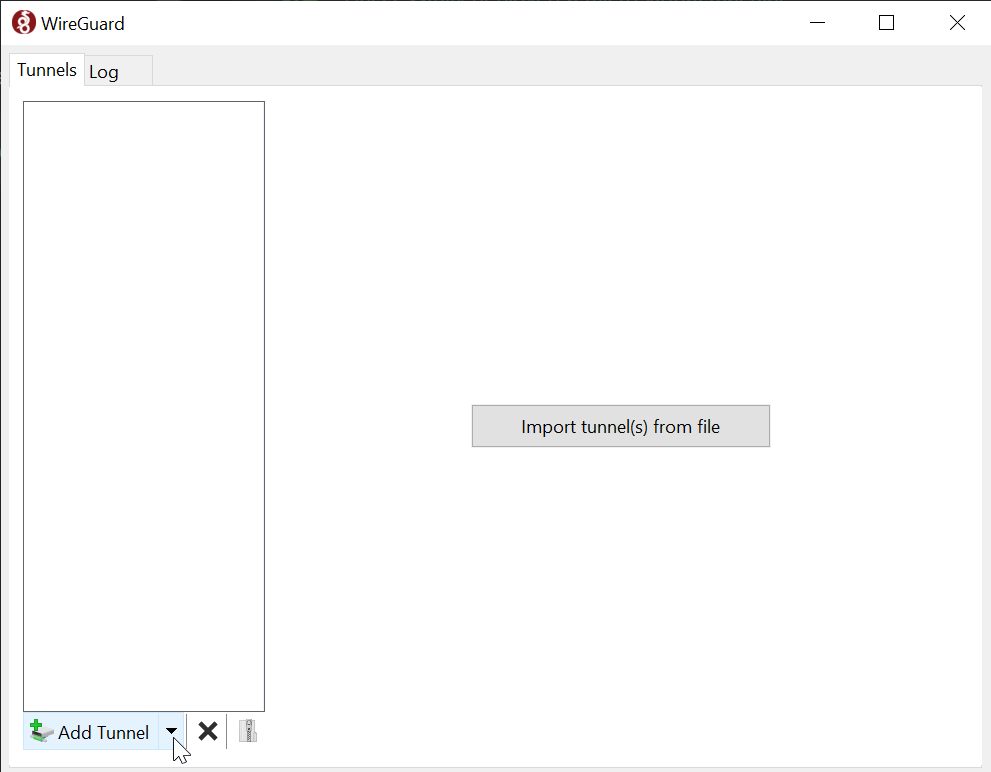
Then select Add empty tunnel. There’s also a shortcut for this: Ctl-N. You’ll see a window with an input box and a prefilled template. Delete this and paste in the configuration copied from the Playground before. Enter a name of your choosing too:
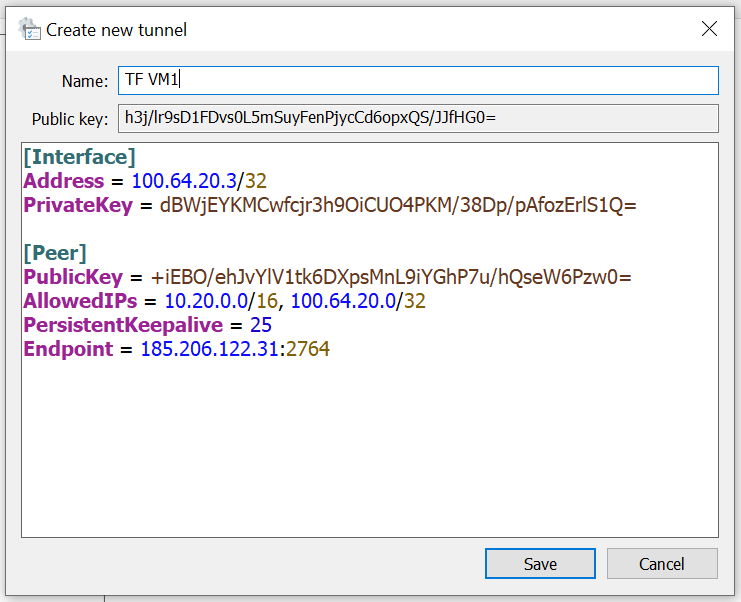
By the way, the contents of this file are sensitive and anyone who has it can connect to your network. That doesn’t mean that they can access your VM though, because it’s still protected by your SSH keys. Basically you’d be no worse off than having your VM accessible over a public IP on the public internet.
Activate the tunnel
Go ahead and hit save, then press the Activate button that appears. If all has gone well, you’ll see a green shield indicating a successful connection.
Go forth and be connected
From here, you can use the WireGuard IP provided by the Playground within your SSH client or anywhere else you’d use an IP address. It’s as if your machine and the VM are within a virtual LAN, where all traffic is end to end encrypted.
If you’re curious about how it works, the Playground automatically selects a node with a public configuration, and that node acts as a relay for traffic between your computer and the VM. The relay node’s IP is the one you see as the Endpoint in the config. Both your computer and the VM form an outbound connection to the public node, thus creating a bridge for traffic to flow in both directions.
Pretty cool, eh?