
This is to inform you all that the backend for Grid V2 is now completely scrapped. If your node/farm is still on Grid V2, it is now time to migrate to V3.
You can follow the steps mentioned below to complete the migration of your farm from V2 to V3:
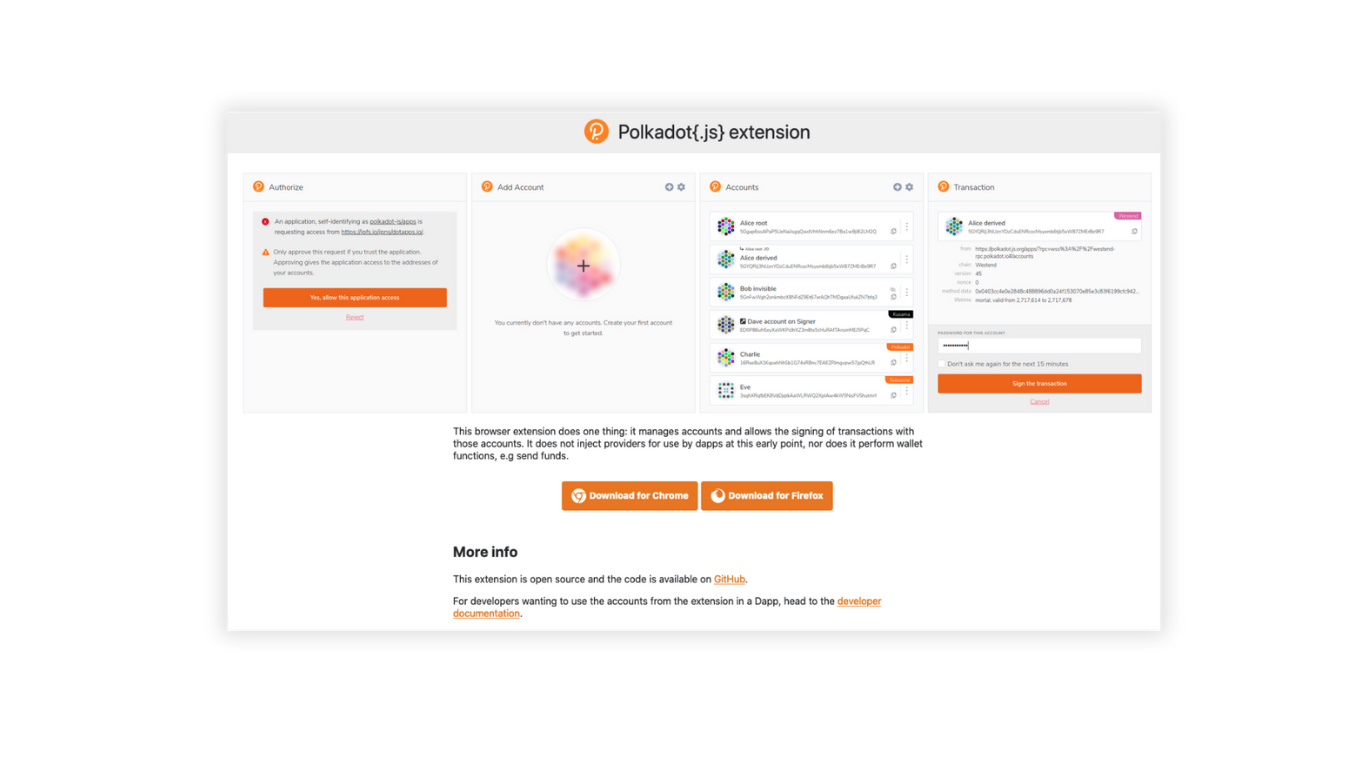
Step 1: Get Your Polkadot Account:
-
Install Polkadot extension on a Chrome or Firefox browser.
-
Now, click on the extension icon on your Browser and select Polkadot.
-
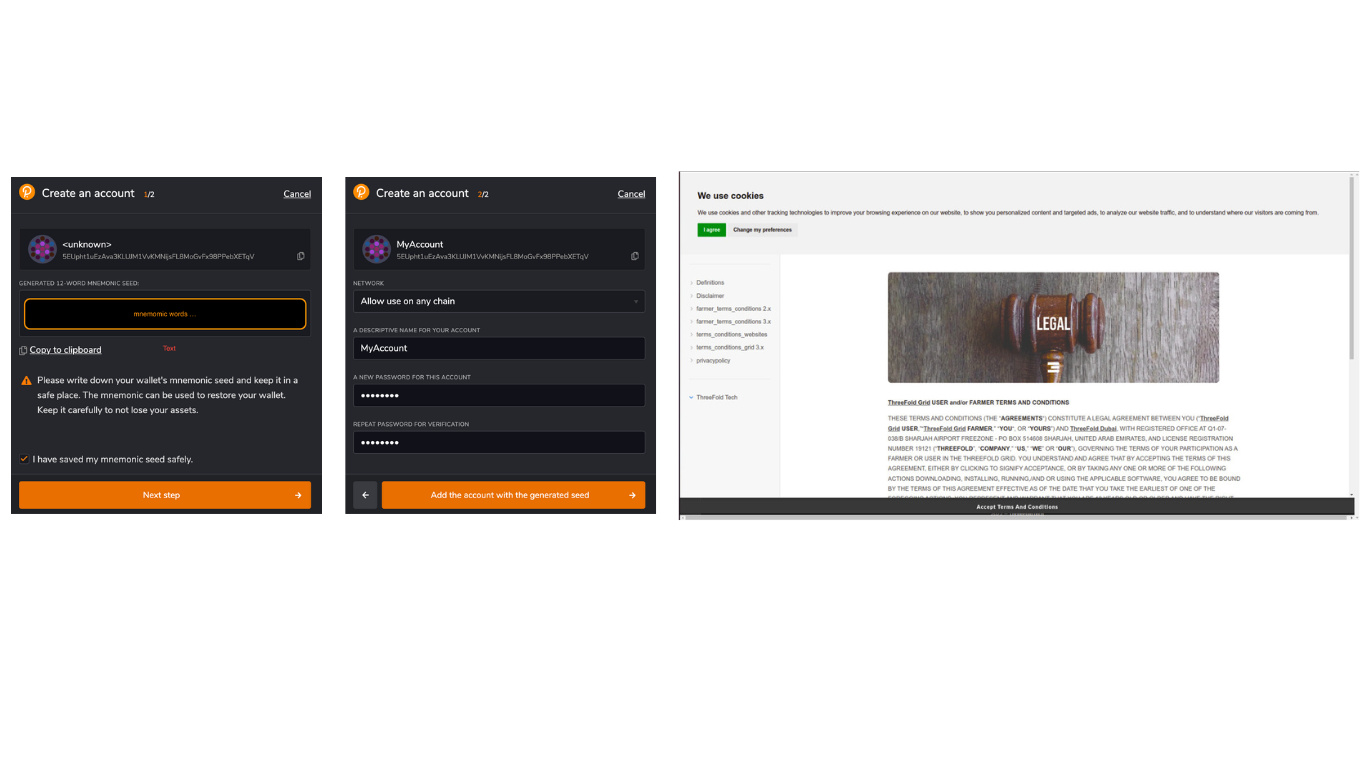
Click on + sign to add a new account. Copy the mnemonic seed and keep it safely as it gives you the access to the TFTs that you will hold on the ThreeFold Grid. Tick on the box stating “I have my mnemonic seed safely” and click on Next Step. ThreeFold does not have access to your mnemonic nor can they recover or be held accountable for loss of your mnemonic or TFT’s.
-
On the next screen, enter an account name and password of your choice. Confirm the password and click on “Add the account with the generated seed key”. Note - Keep the account name and password safely.
Step 2: Create A V3 Farm:
-
After the Polkadot account is created, go to TFChain Portal
-
Now on the Portal, you need to connect your Polkadot account to TFChain by clicking on your Polkadot account visible on the screen.
-
On the next screen, click on “Accept Terms & Conditions”and enter your Polkadot Password to activate your TF Chain Account.
-
Now you’ll need to enter the Twin IP and click on Create. You will be prompted to enter the password for your Polkadot extension and wait for a few seconds for the transaction to complete. (Note - If you want to connect your TwinID to the planetary network, fill in the IPv6 address you get from Yggdrasil. If not, let the Twin IP as it is)
-
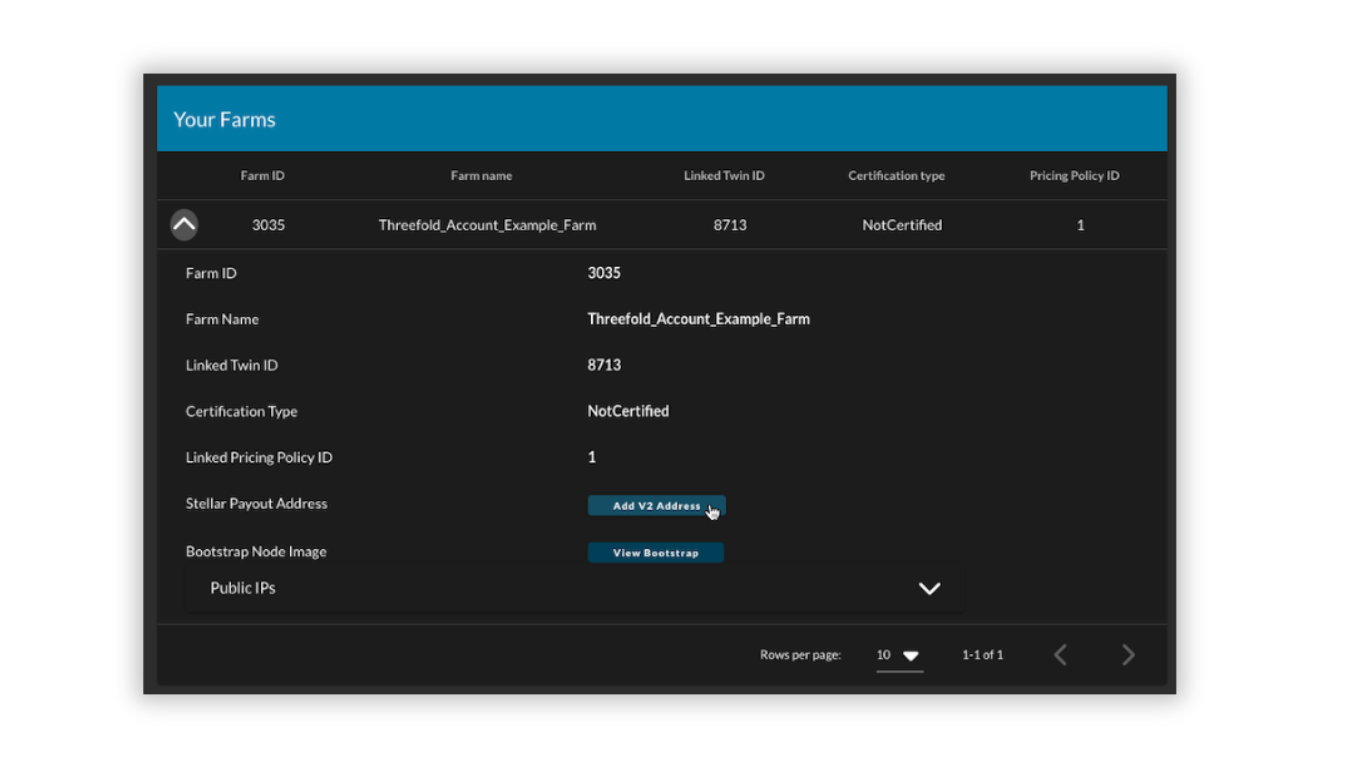
Now select “Farms” from the left navbar and use the “Create Farm” button to create a farm. Again, enter your Polkadot Extension password and wait for the new farm to appear.
- Now you need to connect the farm with your stellar wallet to receive the farming rewards. For this, click on the caret icon to the left of your farm id to open the farm details. Then click the link to add a Stellar payout address and enter your Stellar public address starting with “G…”. Hit save and enter the Polkadot Password to complete the steps.
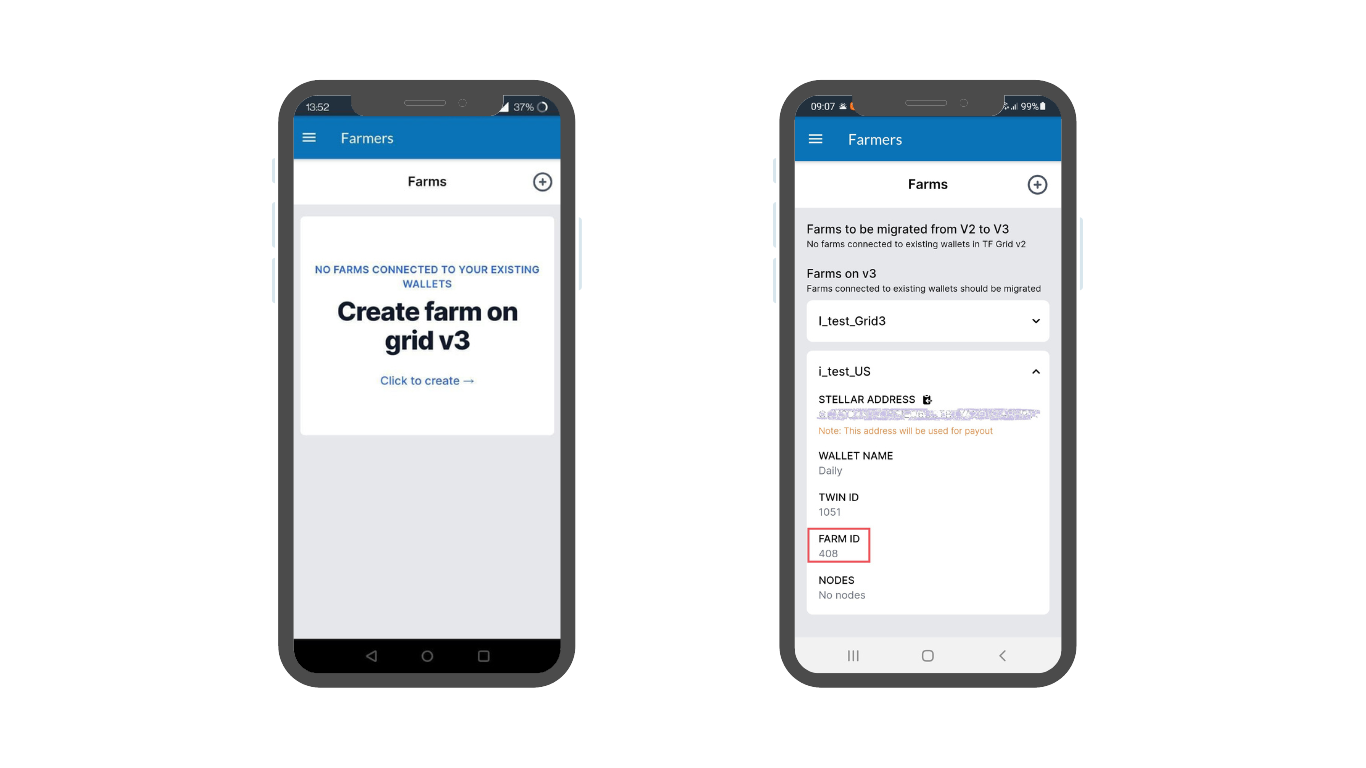
For Step 5 and 6. You can alternatively create a farm on the ThreeFold Connect app as well by following the steps below:
- Go to the ThreeFold Connect app on your mobile device.
- Now, go to the Farming menu and click on + icon to create a new farm.
- Accept the terms and conditions and click on Submit.
Step 3: Create and Burn The Boot Image:
For Certified Node owners:
After creating a farm, provide your Farm IDs and Farm Name to ThreeFold Support on our live chat or by sending an email at info@threefold.io for certification.
The ThreeFold team will then share a boot image file which you will need to replace on the USB drive that is attached to the node. Follow the steps below for this:
- Download the zip file with your new boot image.
- When you unzip it, you’ll see a file, BOOTX64.EFI within the BOOT/EFI directory.
- Simply copy this file onto the USB stick within the same directories that exist there, to overwrite the existing BOOTX64.EFI file.
- Insert the USB drive in the node and boot it again.
- Farm migration to V3 is complete.
For DIY Node owners:
If you are building your own node, follow the steps below:
-
Proceed to the Bootstrap Site to generate a boot image for your V3 farm.
-
On the bootstrap site, enter your Farm ID, scroll down and click on “Go Live” for the Main Network and download the EFI Image and kernel.
Note - If your system is new, you might be able to run the bootstrap in UEFI mode.For older systems, run the bootstrap in BIOS mode. For BIOS CD/DVD, choose ISO. For BIOS USB, choose USB.
- After the boot image is downloaded, follow the steps below to burn it:
For CD/DVD BIOS
For the BIOS ISO image, download the file and burn it on a DVD.
USB Key BIOS+UEFI
For MAC , Linux and Windows , you can use BalenaEtcher to load/flash the image on a USB stick. This program also formats the USB in the process. This will work for the option EFI IMG for UEFI boot, and with the option USB for BIOS boot. Simply follow the steps presented to you and make sure you select the bootstrap image file you downloaded previously.
- Download and Open BalenaEtcher
- Select Flash from file
- Find and select the bootstrap image (with your correct farm ID)
- Select Target (your USB key)
- Select Flash
Now you have a bootstrap image on Zero-OS as a bootable removable media device.
For the BIOS USB and the UEFI EFI IMG images, with Linux, you will want to do:
sudo dd status=progress if=FILELOCATION.ISO(or .IMG) of=/dev/sd*.
Here the * is to indicate that you must adjust according to your disk. To see your disks, write lsblk in the command window. Make sure you select the proper disk!
*If your USB key is not new, make sure that you format it before burning the Zero-OS image.
For Windows, if you are using the “dd” -able image , instead of writing to the command line, you can use the free USB flashing program called Rufus and it will automatically do this with no need for Linux or command line. Rufus also formats the boot media in the process.
Step 4: Boot Zero Os on your node:
-
Plugin the USB disk to your node and configure the BIOS to use it as the boot device. You can reference the documentation for your mainboard to learn how to do this. In case the node loses power or needs to restart for an update, this setting needs to be saved within the BIOS.
-
While you’re in the BIOS, check that the “Network Stack” or “Network Boot” is also enabled to allow Zero OS to boot over the network. Some farmers have also found that “AHCI mode for SATA” is required to support SATA disks.
-
It may take a while for your node to boot up. Once that’s complete, the screen should show that zos has booted and your Node details.
Step 5: Check Node Status on Explorer:
After completing all the steps mentioned above, both Certified and DIY node owners must check their node status is online on the V3 explorer. Keep in mind that it may take a while for your node to show up on the explorer.
If you have any questions, please feel free to reach out to us on the live chat in the ThreeFold Connect app or on our website www.threefold.io